A step-by-step guide on how to brew kombucha at home.
Here, we look at how to home brew your own kombucha.
A lot of people ask us this, so we thought we'd share our kombucha brewing tips.
Brewing your own kombucha is both really easy and really hard at the same time. The process, described below, is quite straightforward. But the devil is in the detail. Brewing your own kombucha takes a lot of care and attention. But don’t let that put you off! Having a home brew of kombucha on the go is super rewarding, very good for you and a lot of fun.
So, the basics. You'll need the following:
Tea leaves
Kombucha is a fermented tea drink. And although it doesn’t taste like your average cuppa, it is tea-based. So, you need tea. Good tea, too. In leaves. You can use black tea or green tea. At Genie, we use black tea as we feel it gives a really robust flavour without too strong a vinegar taste. It's also the type of tea that's been used in traditional kombucha for hundreds of years in Russia and along the old silk route to China (we’ll do another blog on kombucha’s history some other time). Green tea is used in a lot of kombuchas you will see on the shelves, and gives a different, sharper flavour profile. Experiment with both and see what works best for you. Our advice is to avoid anything fancier (like white tea) until you’re really proficient.
For our recipe, we use approximately 8 grams of loose tea.
A jar
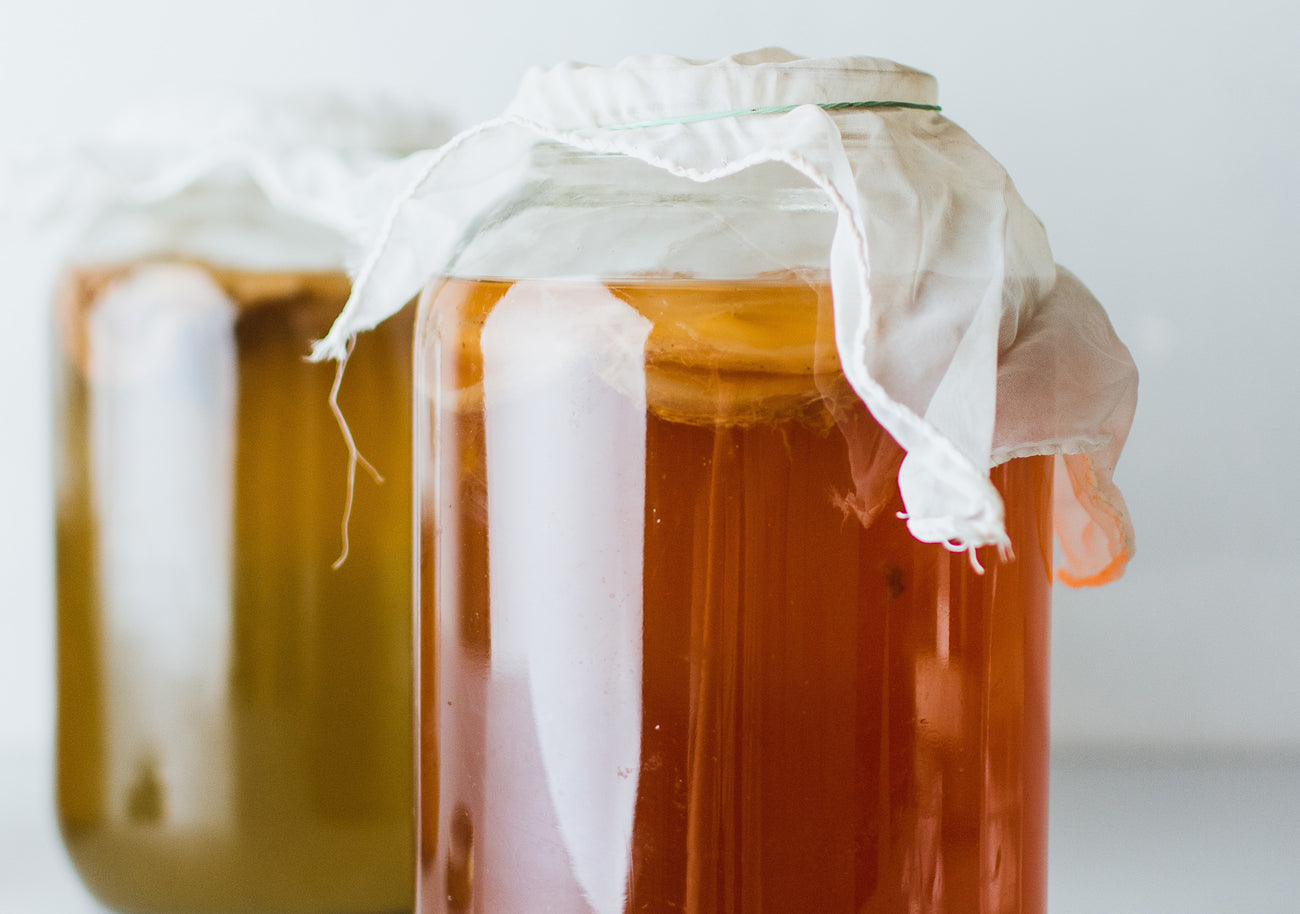
Go for a pretty big one, 1 to 3 litres. A Kilner jar is good but any glass container will do. You could use plastic but glass is nicer, and doesn’t mess with the taste. Make sure your jar is sterile before using (use boiling water or a dishwasher).
For our recipe we use a 2 litre jar.
A SCOBY or SCOBY starter liquid
You're probably wondering, "what is a SCOBY?". If you get into kombucha, you'll hear this term a lot. A SCOBY is an acronym and stands for Symbiotic Culture Of Bacteria and Yeast. If you use a physical SCOBY it looks a bit like an alien blob. But it’s not an alien blob. It's actually the living heart of all kombucha and is the magic that turns kombucha from a big jar of tea into a living, healthy and delicious drink. A nice description we came across is that the SCOBY is the coral reef of the kombucha. Everything else grows off it.
You can buy a SCOBY online, or even better get some off a friend who has been brewing kombucha. For our recipe we use 500ml of SCOBY starter liquid.
Water
Filtered water, please. Have two litres ready for this recipe if using a SCOBY, or 1.5 litres if using the starter liquid.
Sugar
Sugar? Seriously? No Genie drinks have any added sugar. Why are you adding sugar? Don’t worry. If you brew this right (it might take a few goes) all the sugar will be consumed by the SCOBY to create beneficial acids.
We recommend high grade cane sugar (fair trade and ethically sourced). 120 grams for this recipe.
Cotton cloth
Clean and breathable. Needs to fit over the jar.
Rubber band
Needs to fit around the cloth, around the jar top.
How to brew kombucha. A step-by-step guide and recipe:
Step 1:
Boil up 500 ml of filtered water. Add the tea leaves to the jar and pour in the boiled water.
Leave to brew for approximately five minutes. Check with your tea how long the optimal ‘steep’ time is.
Step 2:
Sieve out the tea leaves and add 120 grams of high-grade cane sugar. Stir until fully dissolved.
Step 3:
Pour in 1 litre of chilled filtered water. Stir well and check the temperature is below 30 degrees (or doesn’t feel too burn-y).
Step 4:
Once the tea is cooled, pour in 500ml of SCOBY starter liquid. Don’t add the SCOBY until the water has cooled.
Step 5:
Seal the jar with the cloth and rubber band. Place in a warm and well-ventilated spot, away from direct sunlight. You want the temperature to be in the low 20s, so your kitchen is usually a good spot to brew.
Step 6:
Leave the kombucha to brew for 5 days. After 5 days, remove and dispose of the layer of gooey cellulose that has grown on top of the liquid.
Then the real work begins. Every day you need to stir your brew, for at least two minutes, twice a day. This is really important to get oxygen to run through the liquid, helping the fermentation process and creating a clean brew.
Step 7:
Brew away and keep checking your booch. How long you brew your kombucha is entirely up to you. Most brewers recommend between 2 and 4 weeks. We brew our Genie kombucha for 21 days, which we think is perfect. Keep tasting and checking. You don’t want it sweet so you need to make sure all the sugar has dissolved. Watch alcohol levels too!
Once you are happy that the brew is done, sieve off any remaining cellulose gunk and put a lid on your jar. Whack the kombucha in the fridge and keep it at under 5 degrees. This is important with home brew kombucha. Because if you keep it out and warm, the fermentation will keep going and you'll get some unwanted ethanol. Unless you want an alcoholic kombucha…
Enjoy!
Our next Genie blog post on home brewing will be on how to add delicious natural flavours to your home brew kombucha - just part of the reason our kombucha goes down such a treat!